Call Azure DevOps REST API with Postman
Introduction
Azure DevOps has a great REST API which allows you to quickly extract and manipulate data within Azure DevOps. Said data is extracted or manipulated by sending a HTTP request to a specific service, which subsequently yields a certain response containing the requested data.
The MS Docs definition of a REST API goes as follows:
Representational State Transfer (REST) APIs are service endpoints that support sets of HTTP operations (methods), which provide create, retrieve, update, or delete access to the service’s resources.
When using a REST API, you’d typically go through the following steps:
-
Authenticate: in order to access your organization or team project, you’ll have to prove that you’re indeed part of the DevOps organization or team project in question. We’ll do so using a Personal Access Token (PAT).
-
Send a request: assemble a request which points to a specific resource, using predefined nouns or HTTP verbs (
GET,POST,PUTorDELETE). The pattern will always look like this:VERB https://dev.azure.com/{organization}/_apis[/{area}]/{resource}?api-version={version} -
Receive a response: After you’ve successfully authenticated and sent out a valid request, you’ll receive the requested data in JSON format:
 {
     "object": [
         {
             "field1": "data1",
             "field2": "data2",
             "field3": "data3"
             ...
         }
     ],
     "count": n
 }
Enter Postman
A quick and easy way to access the Azure DevOps REST API is the Postman tool:
Postman is a collaboration platform for API development. You can use Postman to design, build, and test APIs in conjunction with your teammates, and to support developer adoption.
This means that the Postman GUI pretty much goes through the exact same steps mentioned above, without requiring you to write any code. You could for example just as well access the Azure DevOps REST API using PowerShell’s Invoke-RestMethod function. This method does however expects you to:
- take care of authentication yourself: you’ll need to encode the PAT (Personal Access Token) to a Base64 string and add it to the HTTP header.
- construct the request body in JSON format and pass it to the
-Bodyparameter if the service in question expects one. - parse the response in a readable format, using the
ConvertFrom-Jsonfunction for example - …
If you have little experience using REST API’s and/or PowerShell, things can get complicated quickly. Postman offers an alternative and can takes care of most of the stuff I’ve just mentioned for you.
Example
A list of all possible service and calls which are available in the REST API can be found here (see the overview on the left). In the example below we want to get a list of all team projects in our Azure DevOps organization. The exact URI we need is located under Core > Projects > List (click here if you’re unable to find it).
Go ahead and launch Postman where we’ll go through the following steps:
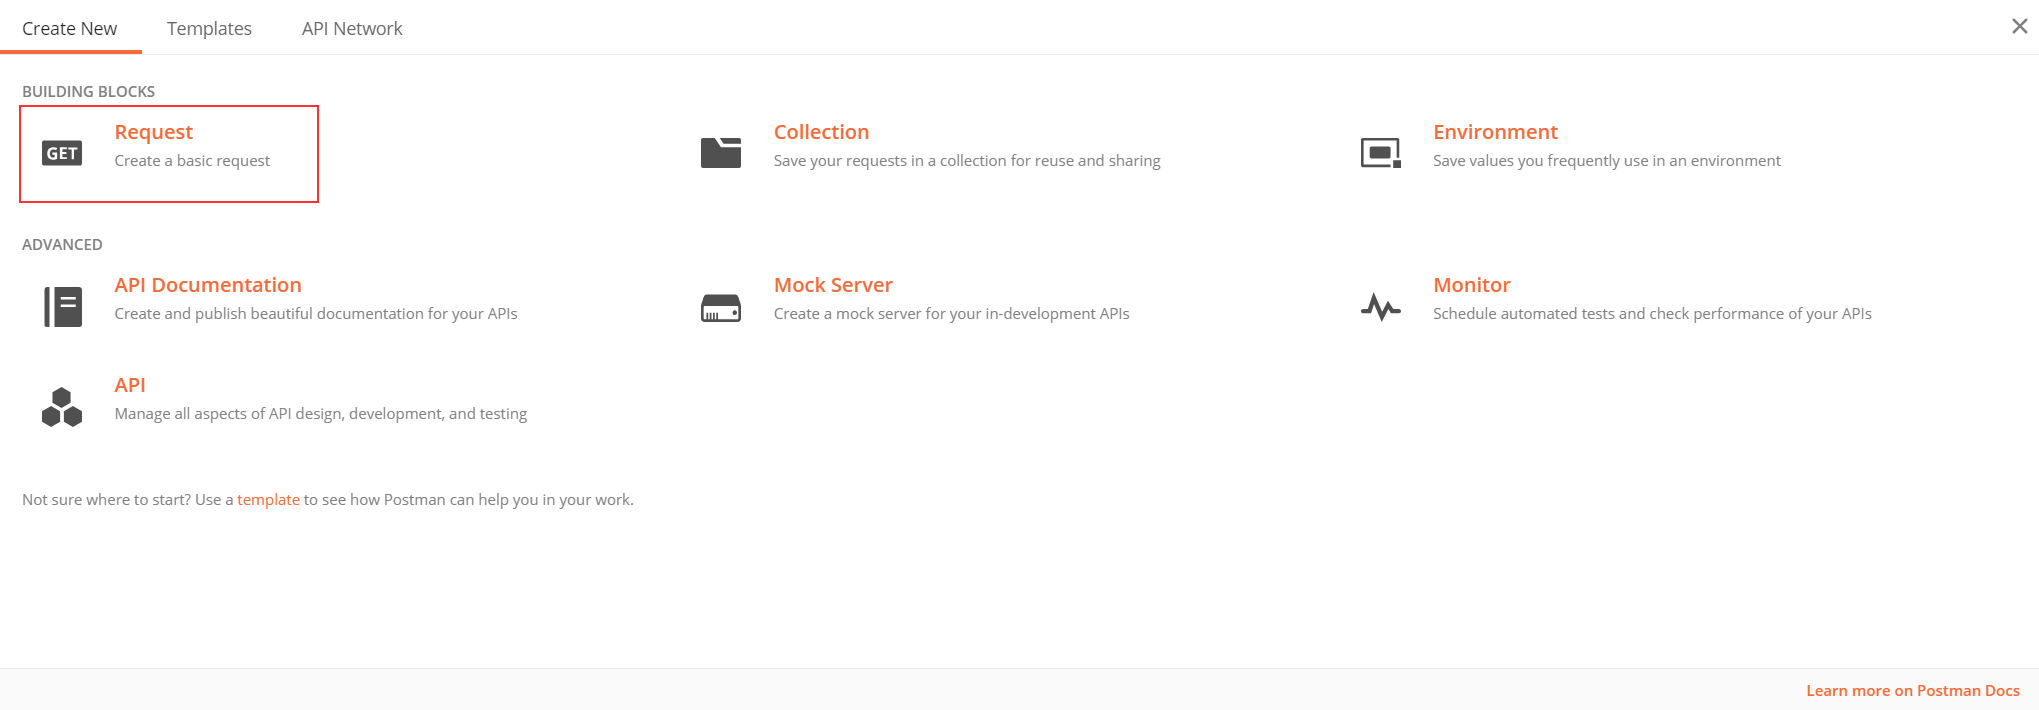
Create a new request
Create a new request by navigating to File > New > Request:
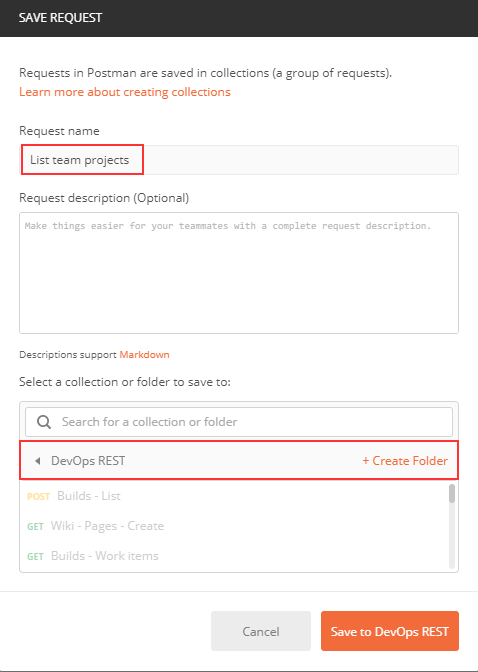
Give your request a clear name (e.g. List team projects), select a specific folder (called Collections in Postman) and click Save to <collection name>:
Authentication
Next up, create a new PAT and make sure to store it in your clipboard.
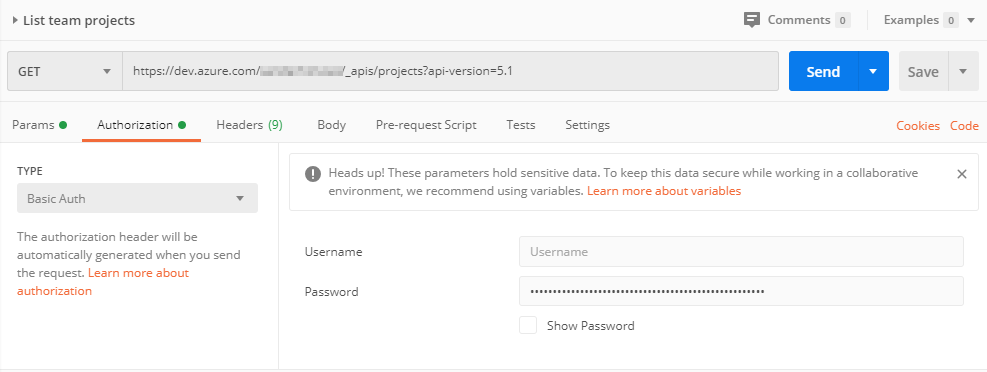
Switch back to Postman and click the Authorization tab:
- Type: Basic Auth
- Username: leave blank
- Password: fill in the PAT you created earlier
Hint: You’d typically use Variables here. You could for example create a PATvariable which can then be used in other requests as well by referencing {{PAT}}.
Send the request
Let’s now create the actual request:
- Select the
GETverb - Fill in the following request URL, replacing
{organization}with the name of your Azure DevOps organization:
https://dev.azure.com/{organization}/_apis/projects?api-version=5.1
Hint: Again, you could make use of Variables by creating an organization variable which can then be referenced using {{organization}}.
Receive the response
Now that we’ve constructed the request message, click the Send button, located to the right of the request URL. If all goes well you should now see a response:
{
    "count": 23,
    "value": [
        {
            "id": "00000000-0000-0000-0000-000000000000",
            "name": "Project A",
            "url": "https://dev.azure.com/<your-org>/_apis/projects/00000000-0000-0000-0000-000000000000",
            "state": "wellFormed",
            "revision": 118,
            "visibility": "private",
            "lastUpdateTime": "2019-11-28T12:34:12.87Z"
        },
        {
            "id": "11111111-1111-1111-1111-111111111111",
            "name": "Project B",
            "url": "https://dev.azure.com/<your-org>/_apis/projects/11111111-1111-1111-1111-111111111111",
            "state": "wellFormed",
            "revision": 161,
            "visibility": "private",
            "lastUpdateTime": "2019-12-09T15:18:12.323Z"
        },
        {
            "id": "22222222-2222-2222-2222-222222222222",
            "name": "Project C",
            "url": "https://dev.azure.com/<your-org>/_apis/projects/22222222-2222-2222-2222-222222222222",
            "state": "wellFormed",
            "revision": 126,
            "visibility": "private",
            "lastUpdateTime": "2019-11-28T12:43:12.16Z"
        }
        ...
        }
    ]
}
You should now see a list of all team projects contained within your Azure DevOps organization in JSON format. Each object contains the following data:
- id: Project identifier (GUID).
- name: Project name.
- url: URL to the full version of the object.
- state: The current state of the project.
- revision: Project revision.
- visibility: Indicates whom the project is visible to.
- lastUpdateTime: Project last update time.
See the Definitions to find out how the response is constructed.
That’s all there is to it. You can now go ahead and experiment with other services which are available in the Azure DevOps REST API. You could for example get a list of all teams in your organization.
As you create new types of requests, make sure to carefully read the specifications of a specific call. A couple of things to keep in mind:
- Make sure your PAT has a suitable scope and hasn’t expired.
- Use the correct HTTP verb (
GET,PUT,POST, …) - Point to the correct request URL, as these don’t always start with
https://dev.azure.com/... - Supply all required URI parameters, and have a look at optional parameters which could help narrowing down the number of objects in your response.
Comments